 Pin
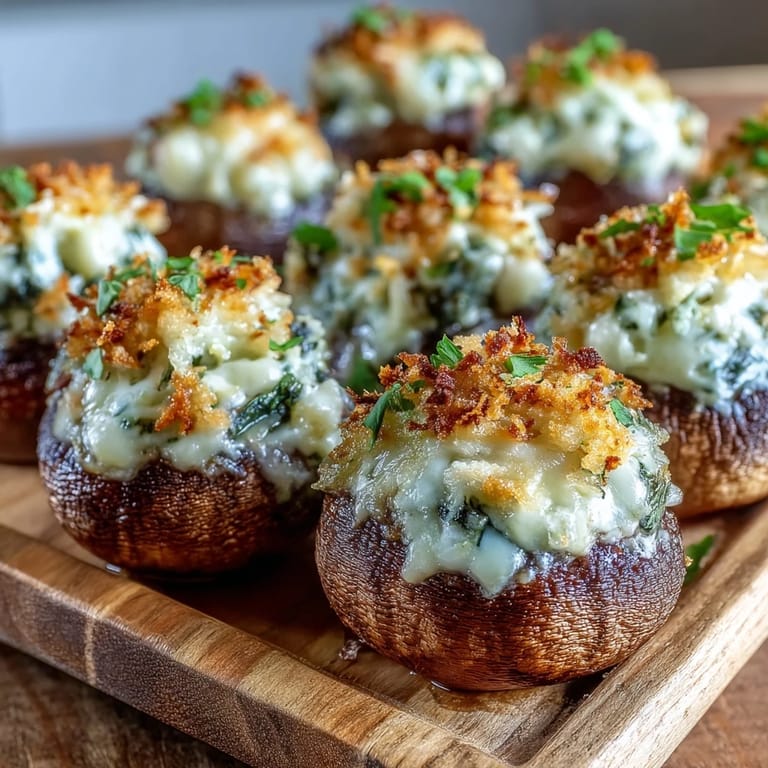
Pin My neighbor knocked on the door one evening with a platter of these golden-topped mushrooms, and I've been chasing that recipe ever since. There's something about the way the Asiago gets crispy while the filling stays creamy underneath that makes them impossible to stop eating. She finally relented and shared her method, though not before making me promise I'd serve them at my next dinner party. That was three years ago, and these stuffed mushrooms have shown up at nearly every gathering since.
I made these for the first time when my sister announced she was bringing her new partner to dinner, and I needed something that felt both approachable and a little bit special. Watching them disappear from the plate before everyone sat down told me I'd made the right choice, and it's become our inside joke—they're called the relationship-sealer mushrooms now.
Ingredients
- 24 medium cremini or white button mushrooms: Look for ones that are roughly the same size so they cook evenly, and don't worry if they look a bit dusty—just wipe them gently with a damp cloth rather than washing them, which keeps them from getting waterlogged.
- 1 tablespoon olive oil: This is for sautéing the stems, so use something you don't mind cooking with rather than your best finishing oil.
- Reserved mushroom stems, finely chopped: This is the secret—using the stems means nothing goes to waste, and they add an earthy depth to the filling that you can't replicate any other way.
- 2 cloves garlic, minced: Fresh garlic makes a real difference here, so don't reach for the jarred version.
- 2/3 cup grated Asiago cheese: If you can, grate it yourself from a block rather than buying pre-shredded, which tends to clump up when mixed with the cream cheese.
- 1/3 cup cream cheese, softened: Leave it on the counter for 15 minutes before mixing so it blends smoothly without lumps.
- 1/3 cup breadcrumbs, preferably panko: Panko gives the filling a slightly lighter texture than regular breadcrumbs, and it also browns more beautifully on top.
- 1/4 cup fresh basil leaves, finely chopped: Tear or chop it just before mixing to keep the flavor bright and fresh.
- 2 tablespoons chopped fresh parsley: This adds a subtle herbaceous note that keeps the filling from tasting one-dimensional.
- 1/4 teaspoon freshly ground black pepper: Freshly ground really does taste better here, especially since everything else is so creamy.
- 1/8 teaspoon salt: Start with a little less than you think you need, since the cheeses are already salty.
- 2 tablespoons grated Asiago cheese for topping: This is what gets golden and crispy, so don't skip this layer.
- 1 tablespoon olive oil for drizzling: A light drizzle helps the tops turn golden and prevents them from drying out.
Tired of Takeout? 🥡
Get 10 meals you can make faster than delivery arrives. Seriously.
One email. No spam. Unsubscribe anytime.
Instructions
- Get your oven ready and prep your workspace:
- Preheat to 375°F and line your baking sheet with parchment paper so cleanup is effortless later. This simple step saves you from scrubbing.
- Clean and stem your mushrooms:
- Gently wipe the mushroom caps clean and carefully remove the stems by twisting them out or using a small spoon to pop them free. Finely chop the reserved stems right away so they're ready for sautéing.
- Sauté the stems and garlic until fragrant:
- Heat olive oil in a skillet over medium heat and add the chopped stems and garlic, stirring often for about 3 to 4 minutes until softened and any moisture has evaporated. This concentrates the mushroom flavor and prevents the filling from becoming watery.
- Mix the filling with care:
- Once the mushroom mixture has cooled slightly, combine it in a bowl with the Asiago, cream cheese, breadcrumbs, basil, parsley, pepper, and salt, folding gently until everything is just blended. Don't overmix, or the filling becomes dense.
- Fill the caps generously:
- Using a spoon or small ice cream scoop, mound the filling into each mushroom cap, pressing down lightly so it stays put during baking. Arrange them on the prepared sheet with a little breathing room between each one.
- Top with cheese and oil:
- Drizzle the tops lightly with olive oil and sprinkle a pinch of Asiago over each mushroom. This creates that golden, crispy finish everyone loves.
- Bake until golden and tender:
- Slide into the oven for 18 to 20 minutes, watching toward the end until the tops turn light golden brown and the mushrooms have softened slightly. The exact time depends on your oven, so keep an eye on them the first time you make them.
- Cool briefly before serving:
- Let them rest on the baking sheet for a couple of minutes so they firm up just enough to pick up without falling apart. They taste equally good warm or at room temperature if you're making them ahead.
 Pin
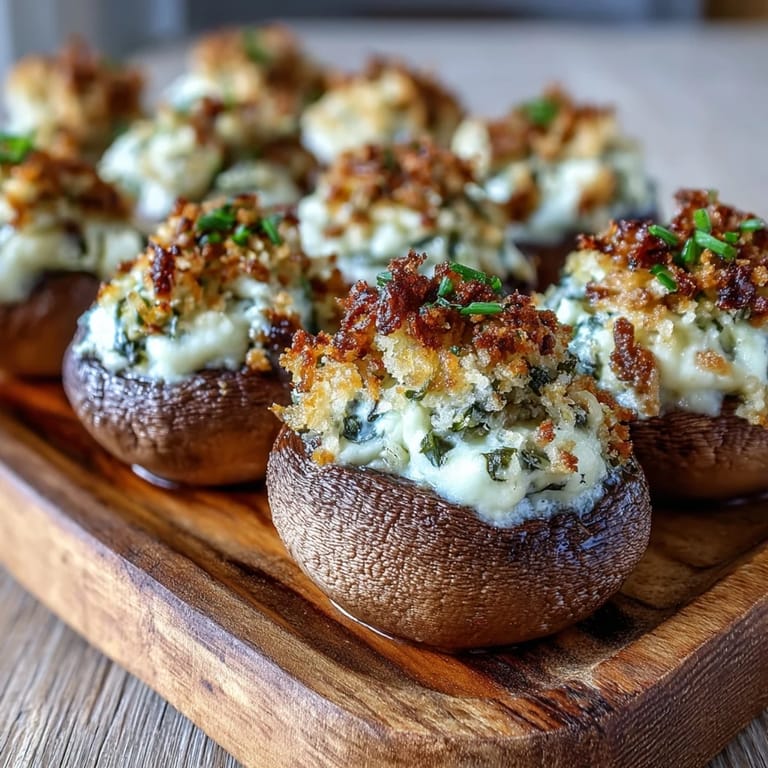
Pin There was an evening when I made these for a small dinner party and realized halfway through that I was out of cream cheese, so I improvised with a little extra Asiago and some ricotta instead. The filling turned out slightly less rich but somehow even more interesting, and it became my accidental favorite variation.
Why These Feel Like More Than Just an Appetizer
There's something about serving homemade stuffed mushrooms that shifts the energy of a gathering, even if it's just a casual weeknight dinner. People linger around the platter, and suddenly everyone's sharing stories or compliments, and you realize food that took 35 minutes to make has created a moment worth remembering.
Making Them Your Own
Once you nail the base recipe, you can play around with substitutions without losing the magic. Swapping the Asiago for Pecorino Romano gives them a sharper bite, while Gruyère makes them feel more decadent. I've also added a tiny pinch of red pepper flakes for heat, or a squeeze of lemon zest for brightness, depending on what I was serving them alongside.
Timing and Storage Tips
The real beauty of these mushrooms is how forgiving they are timing-wise. You can stuff them up to 4 hours ahead, cover them loosely with plastic wrap, and refrigerate until you're ready to bake. They also reheat beautifully in a 325°F oven for about 10 minutes if you need to make them earlier in the day.
- If you're serving a crowd, double or triple the recipe since they disappear faster than you'd expect.
- Leftover stuffed mushrooms keep in an airtight container for up to 3 days and taste just as good cold the next day.
- For a gluten-free version, swap in gluten-free panko breadcrumbs and check your Asiago label to be sure.
 Pin
Pin These mushrooms have earned their place at my table because they're simple enough to make on a weeknight but elegant enough to serve when it matters. Once you taste them, you'll understand why my neighbor guarded the recipe so carefully.
Recipe Q&A
- → Can I prepare these mushrooms ahead of time?
Yes, you can assemble the stuffed mushrooms up to 24 hours in advance. Cover them tightly with plastic wrap and refrigerate. Add 3-5 minutes to the baking time if cooking directly from the refrigerator.
- → What's the best way to clean mushrooms?
Gently wipe mushrooms with a damp paper towel or soft brush to remove dirt. Avoid soaking them in water as they absorb moisture quickly, which can make them soggy when cooking.
- → Can I substitute the Asiago cheese?
Absolutely. Parmesan, Pecorino Romano, or Gruyère work wonderfully as alternatives. Each will provide a slightly different flavor profile while maintaining the creamy, savory character of the dish.
- → How do I know when the mushrooms are done?
The mushrooms are ready when they're tender to the touch and the filling is golden brown on top. This typically takes 18-20 minutes at 375°F. The mushrooms should release their juices slightly.
- → Can these be made gluten-free?
Yes, simply substitute regular breadcrumbs with gluten-free breadcrumbs or panko. The texture and flavor will remain virtually identical to the original version.
- → What size mushrooms work best?
Medium cremini or white button mushrooms (about 1.5-2 inches in diameter) are ideal. They provide enough space for the filling while remaining bite-sized and easy to handle as appetizers.