 Pin
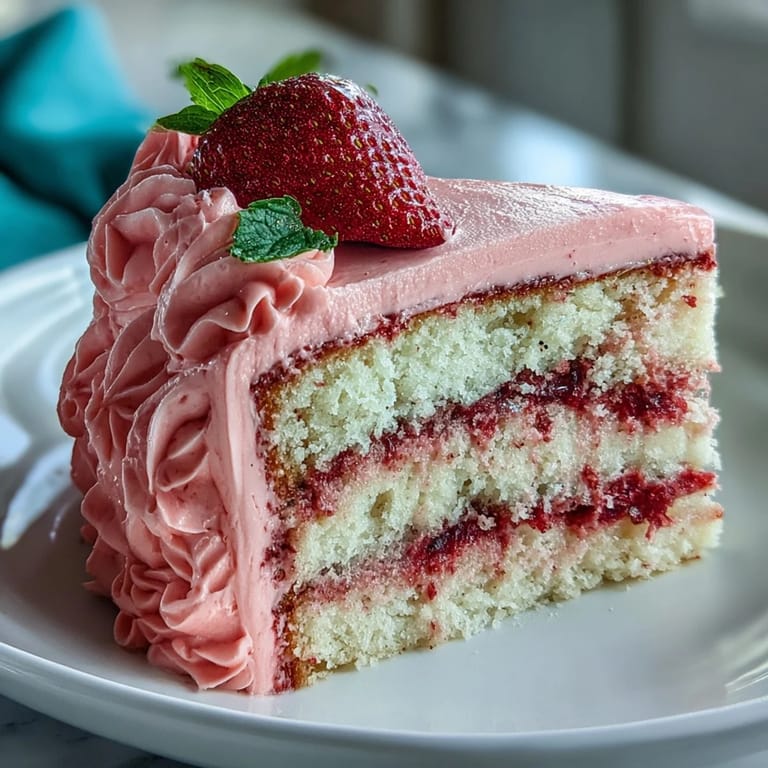
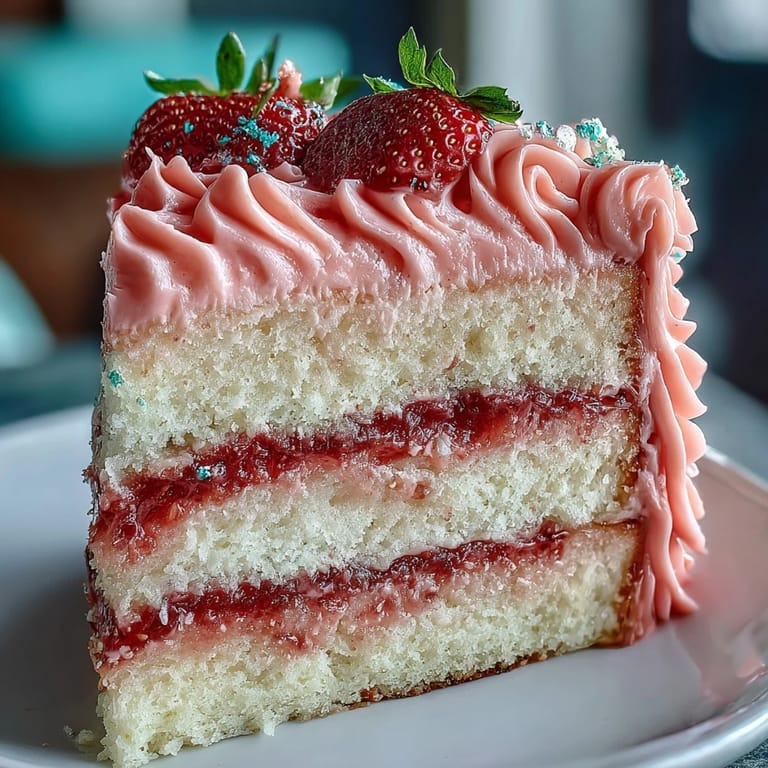
Pin My friend texted me a photo of a pink ombre cake she'd seen online, asking if I could recreate it for her Valentine's Day dinner party. I'd never attempted an ombre effect before, but something about the challenge felt right—layering different shades of strawberry buttercream until they melted into each other like a sunset. When I pulled that finished cake out of the fridge and sliced into it, revealing those perfectly neat layers underneath the gradient frosting, I understood why she'd sent that desperate plea. This vanilla cake with its silky strawberry buttercream became the thing everyone talked about long after the party ended.
I made this for my sister's engagement celebration, and watching her face when she saw the gradient was worth every minute spent tinting buttercream in three separate bowls. The kitchen smelled like vanilla and strawberries for hours afterward, and my mom kept sneaking tastes of the leftover frosting straight from the spatula. That cake became the backdrop for so many photos that night, but honestly, it tasted even better than it looked.
Ingredients
- All-purpose flour: The foundation for a tender, reliable crumb that won't feel dense or heavy once frosted.
- Baking powder: Make sure yours is fresh (check that date) or your layers will bake flat.
- Unsalted butter: Room temperature is non-negotiable here—cold butter won't cream properly and you'll end up with a gritty texture.
- Granulated sugar: This creams with the butter to add lift and structure to the cake itself.
- Large eggs: Also room temperature, because they incorporate more evenly and create a more stable batter.
- Pure vanilla extract: The real thing matters; imitation will taste sharp against the delicate strawberry frosting.
- Whole milk: Room temperature milk alternates with the dry ingredients to create a silky, even crumb.
- Unsalted butter for frosting: Same reason as above—you need it soft and pliable to beat into clouds of buttercream.
- Powdered sugar, sifted: Sifting removes lumps and makes the frosting smooth; skipping this step means gritty frosting every time.
- Freeze-dried strawberries, finely ground: These pack strawberry flavor without the water content that would weigh down your frosting—a game-changer compared to fresh berries.
- Heavy cream or milk: Just a touch loosens the frosting so it spreads without tearing the cake layers.
- Vanilla extract: A whisper of vanilla in the frosting balances the strawberry sweetness.
- Pink gel food coloring: Gel coloring won't water down your frosting the way liquid coloring does, so you get true pastel shades.
- Fresh strawberries for garnish: Optional, but they finish the look and hint at what's inside.
Tired of Takeout? 🥡
Get 10 meals you can make faster than delivery arrives. Seriously.
One email. No spam. Unsubscribe anytime.
Instructions
- Heat your oven and prep your pans:
- Set your oven to 350°F and line three 8-inch pans with parchment paper—this prevents sticking and makes turning out the cakes so much easier. Greasing both the pan and the paper gives you extra insurance.
- Combine your dry ingredients:
- Whisk flour, baking powder, and salt together in a medium bowl so everything is evenly distributed. This is where you catch any lumps in the flour before they ruin your batter.
- Cream the butter and sugar:
- Beat them on medium-high speed for about 3 minutes until the mixture looks pale and fluffy, almost like mousse. Listen for the mixer to sound less grainy—that's your cue it's ready.
- Add the eggs one at a time:
- Let each egg fully incorporate before adding the next; this prevents the batter from breaking and ensures even moisture distribution. The mixture should look smooth and glossy after all four eggs are in.
- Pour in the vanilla extract:
- Just a tablespoon transforms the whole cake from plain to memorable.
- Alternate your wet and dry ingredients:
- Start and end with the flour mixture, alternating in three additions with the milk in between. Mix on low speed just until combined—overmixing develops gluten and creates a tough, dense cake.
- Divide the batter evenly:
- Pour the batter into the three pans and smooth the tops with a spatula so they bake at the same rate. Uneven layers bake unevenly.
- Bake until golden:
- After 25 to 30 minutes, a toothpick inserted in the center should come out clean with just a few crumbs. Don't open the oven door before 25 minutes or you'll shock the rising cake.
- Cool in the pans, then completely:
- Let them cool for 10 minutes in the pans so they set enough to handle, then turn them out onto wire racks. They need to cool completely before frosting or the buttercream will melt.
- Make the strawberry buttercream:
- Beat the room-temperature butter until creamy, then gradually add the sifted powdered sugar and ground freeze-dried strawberries. The gradual addition prevents a cloud of powdered sugar from covering your kitchen.
- Adjust consistency and flavor:
- Mix in cream, vanilla, and salt, then beat until fluffy and smooth, about 2 to 3 minutes. You want it light enough to spread but sturdy enough to hold those ombre lines.
- Create three shades:
- Divide the buttercream into three bowls—leave one plain for the lightest shade, add a tiny amount of pink gel coloring to the second, and add more to the third for the deepest pink. Start with less coloring than you think you need; you can always add more, but you can't take it out.
- Fill your piping bags:
- Transfer each shade into its own piping bag, or just spoon it directly onto the cake if you're not piping—both work beautifully.
- Stack and level your layers:
- If the cake tops domed slightly during baking, carefully trim them level with a serrated knife so your cake sits even. Place the first layer on your serving plate and spread a layer of the lightest buttercream on top.
- Build the layers:
- Add the second layer and repeat with medium pink frosting, then the third layer with the darkest pink. This creates the ombre effect from inside out.
- Create the gradient effect:
- Spread the darkest pink buttercream around the bottom third of the outside, medium pink in the middle, and lightest pink on top. Use an offset spatula or cake scraper to blend the colors slightly where they meet, feathering them together for a seamless transition.
- Garnish and chill:
- Add fresh strawberries and edible glitter if you like, then refrigerate for 30 minutes so the cake firms up and slices cleanly. This waiting period is your friend—it makes serving so much easier.
 Pin
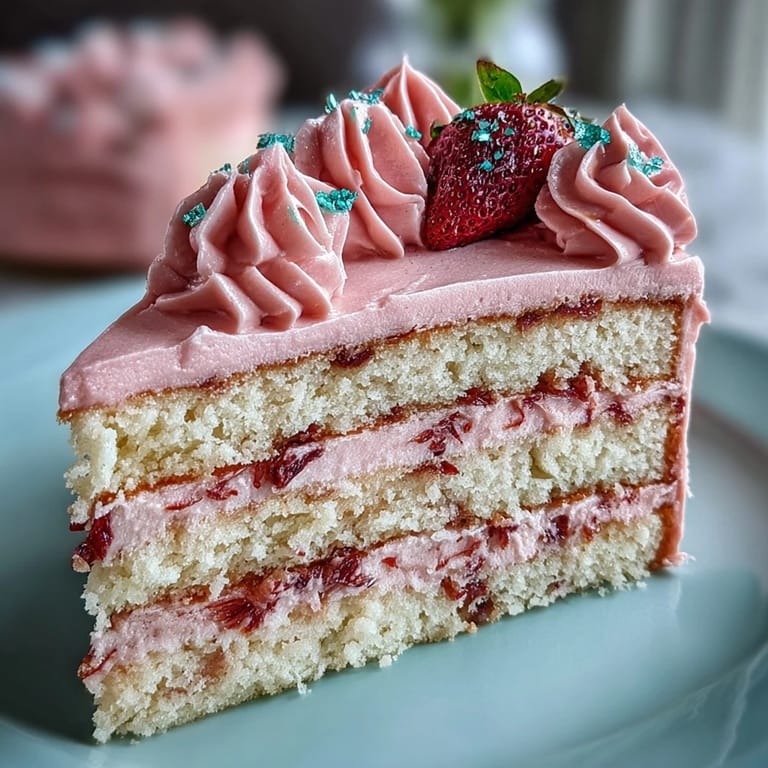
Pin There's a specific moment when you smooth those three shades of pink together and step back to see what you've created—that's when this cake stops being just dessert and becomes something you made with your own hands. It reminded me that sometimes the most impressive things come from trying something new and not being afraid of layers, both literal and figurative.
Make-Ahead Strategy
Bake your layers up to a month ahead and freeze them wrapped tightly in plastic wrap—they'll taste just as fresh when thawed. The frosting can be made the morning of, and the actual assembly takes maybe 30 minutes if you work without rushing. This flexibility means you can show up to a party relaxed instead of frazzled from last-minute baking.
Customizing Your Ombre
The beauty of this recipe is that you can swap the strawberry for any freeze-dried fruit you love—raspberries, blackberries, or even a mix—and adjust your coloring accordingly. I've also made this with a subtle peach gradient by using freeze-dried peaches and peachy-pink coloring, and it was equally stunning. The technique stays the same even if your flavor journey changes.
Flavor Layers and Serving Tips
If you want to echo the strawberry theme even more, spread a thin layer of strawberry jam between the cake layers before frosting—it adds moisture and intensifies the berry flavor. The cake pairs beautifully with sparkling rosé, or serve it with a simple cup of tea for a quieter celebration. Think about your audience and the mood you're setting, because this cake is as much about the moment as it is about the taste.
- A sharp serrated knife dipped in hot water and wiped clean between slices keeps your layers looking neat and your frosting from smudging.
- Room-temperature frosting spreads more easily than cold frosting, but a cake that's been chilled holds its layers firmer during serving.
- Leftover frosting keeps in the fridge for up to five days and makes an incredible frosting for cupcakes or as a dip for fresh fruit.
 Pin
Pin This cake reminds me that beautiful things don't have to be complicated—just thoughtful and made with a little attention to detail. Bring it to the table and watch the room light up.
Recipe Q&A
- → How is the strawberry flavor incorporated?
Finely ground freeze-dried strawberries are blended into the buttercream, providing natural strawberry flavor and color.
- → What gives the frosting its pink ombre effect?
Three buttercream batches are tinted with varying amounts of pink gel food coloring to create a gradient, layered from dark to light.
- → Can the cake layers be prepared in advance?
Yes, cake layers can be baked and frozen for up to one month before assembling.
- → What tools are needed for decoration?
An offset spatula, cake scraper, and piping bags are used for smooth application and the ombre buttercream effect.
- → Is this suitable for vegetarian diets?
Yes, all ingredients are vegetarian-friendly, with dairy, eggs, and wheat included.