 Pin
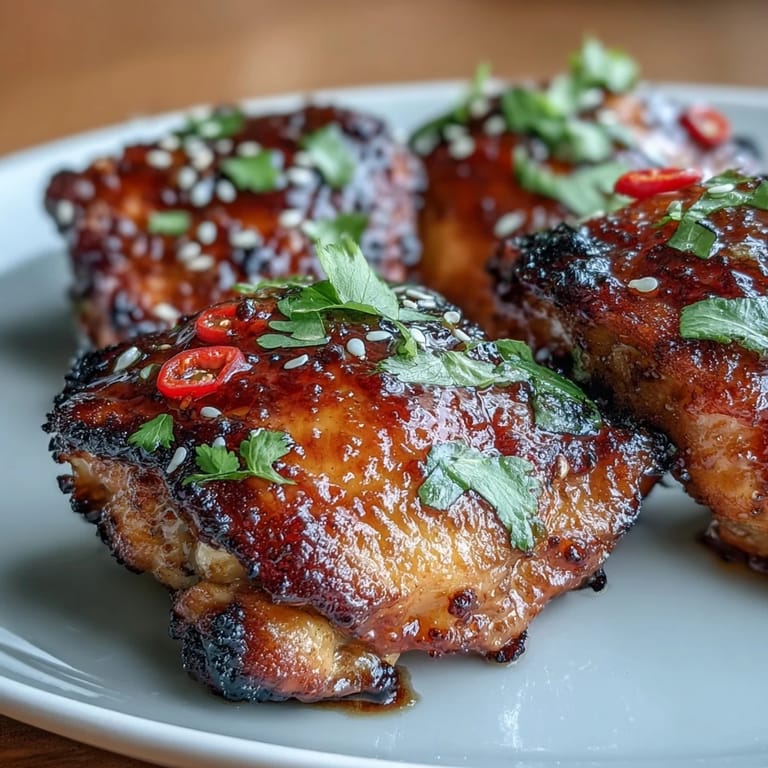
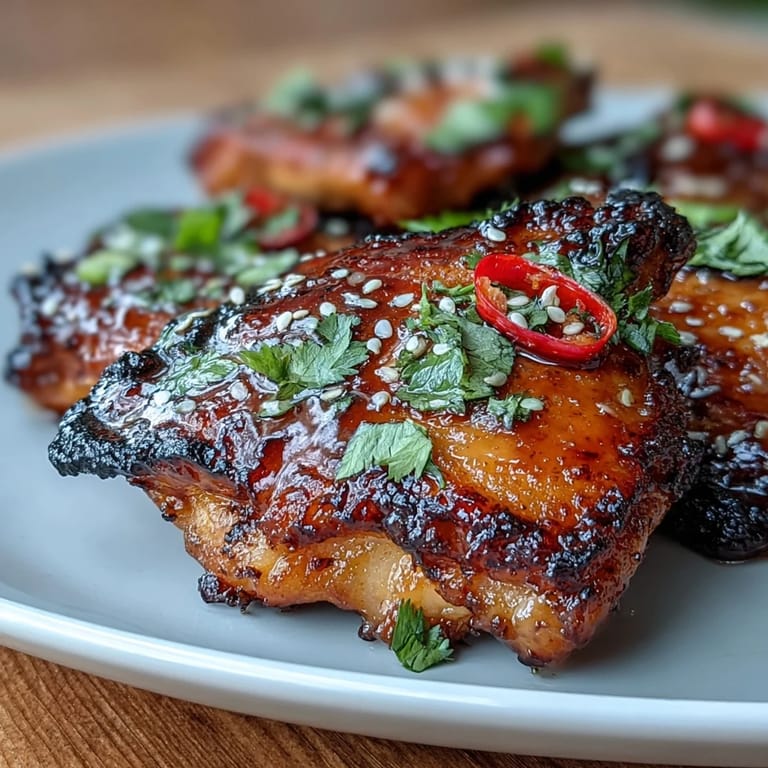
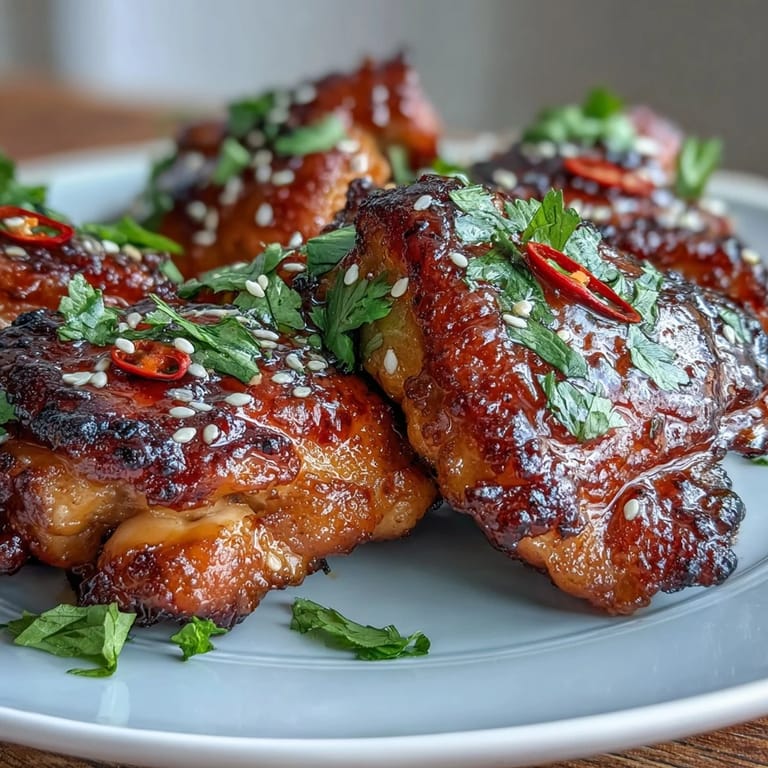
Pin There's something magical about the moment when sticky-sweet chili jam hits roasting chicken skin and the oven fills with this urgent, spicy-sweet aroma that makes everyone wander into the kitchen asking when dinner will be ready. I discovered this glaze completely by accident one Tuesday evening when I found a jar of chili jam in the back of my pantry and decided to experiment rather than order takeout. What emerged was this impossibly easy dish that somehow tastes like you've spent hours developing flavors, yet your hands-on time is barely ten minutes. The glaze caramelizes into this glossy, jammy coating that clings to tender chicken thighs, delivering both heat and honeyed sweetness in every bite. Now it's become my go-to move when I want something that feels special without the stress.
I made this for my sister's casual dinner party last summer, and I watched her take one bite and close her eyes like she was transported somewhere. She asked for the recipe immediately, convinced I'd been secretly taking cooking classes. The beauty of this dish is that it looks intentional and intricate, but honestly, you're just brushing a glaze onto chicken and letting the oven do the work—which means you get to actually enjoy your guests instead of being trapped in the kitchen.
Ingredients
- Bone-in, skin-on chicken thighs (8 pieces, about 1.2 kg): The skin crisps beautifully and the bone keeps the meat tender, plus thighs are forgiving if you're not obsessive about timing like I used to be.
- Chili jam (100 g or about 1/3 cup): This is your secret weapon—look for it in the Asian section of your market or a specialty store, and trust that one jar will become your new kitchen staple.
- Soy sauce (2 tbsp, or tamari for gluten-free): Use tamari if you're avoiding gluten, and don't skip this because it adds the savory backbone that keeps the sweetness from becoming cloying.
- Honey (1 tbsp): Amplifies the glaze's sticky, glossy quality as it caramelizes in the heat.
- Rice vinegar or apple cider vinegar (1 tbsp): A small splash cuts through richness and adds brightness that balances the heat.
- Garlic and fresh ginger (1 clove and 1 tsp respectively, minced and grated): These aromatics wake up the entire glaze with complexity you wouldn't expect from such modest amounts.
- Spring onions, red chili, cilantro, and sesame seeds (for garnish, optional): These toppings add freshness and textural contrast that transforms the dish from simple to vibrant.
Tired of Takeout? 🥡
Get 10 meals you can make faster than delivery arrives. Seriously.
One email. No spam. Unsubscribe anytime.
Instructions
- Get Your Oven and Tray Ready:
- Preheat to 200°C (400°F) and line your baking tray with parchment paper so cleanup later feels like a gift to your future self. This temperature is hot enough to render the chicken skin crispy while keeping the meat moist.
- Prepare the Chicken:
- Pat each thigh completely dry with paper towels—this is the one step where you actually do need to be thorough, because moisture is the enemy of crispy skin. Arrange them skin-side up on your prepared tray and season lightly with salt and pepper, leaving room to move air around each piece.
- Build Your Glaze:
- In a small bowl, whisk the chili jam, soy sauce, honey, vinegar, minced garlic, and grated ginger until everything is smooth and glossy. This should take less than a minute and the mixture should smell incredibly complex for how simple it is.
- First Glaze Application:
- Brush a generous layer of glaze over each chicken thigh, coating the skin generously but reserving about one-third of the mixture. You're building layers of flavor here, so don't be shy.
- Initial Roast:
- Slide the tray into your hot oven and roast for 30 minutes without peeking obsessively like I used to do. The chicken will begin developing color and the skin will start its journey toward crispiness.
- Second Glaze Application:
- Remove the tray carefully and brush the reserved glaze over each thigh, paying special attention to any dry spots. This second coat is what creates that gorgeous caramelized finish.
- Final Roast and Check:
- Return to the oven for another 5 to 8 minutes until the glaze is deeply caramelized and sticky, and an instant-read thermometer inserted into the thickest thigh (without touching bone) reads 75°C (165°F). Your kitchen should smell absolutely insistent by now.
- Rest and Serve:
- Let the chicken rest for 5 minutes on the tray before transferring to your serving platter. Transfer carefully so that gorgeous glaze doesn't slip off, then garnish generously with spring onions, chili slices, cilantro, and sesame seeds if you're using them.
 Pin
Pin There was one evening when my teenage son, who claims to hate anything he deems "weird," finished three thighs and asked if I'd be making this again soon. That's when I realized this dish has some kind of magic that transcends picky eating and cooking skepticism—it's just genuinely delicious in a way that doesn't require an acquired palate.
Playing With Heat and Flavor
The beauty of this glaze is its flexibility—the chili jam provides the base heat, but you can dial things up or down depending on who's eating. If you want extra fire, add a teaspoon of sriracha or your favorite hot sauce to the glaze mixture, whisking it in before you brush. If you're cooking for people who find heat intimidating, don't add anything extra and let the chili jam's balanced sweet-spicy profile do its thing, which honestly is enough for most people.
What to Serve Alongside
I've found that steamed jasmine rice is the classic pairing because it cools the heat and soaks up that incredible glaze pooling on the plate, but roasted vegetables like bok choy or snap peas work beautifully too if you want something lighter. A crisp salad with lots of lime dressing cuts through richness and adds another layer of brightness that keeps the meal from feeling heavy. The key is choosing sides that won't compete with the chicken's sticky-sweet-spicy moment in the spotlight.
Variations and Swaps That Work
If you can't find chili jam or want to experiment, a combination of sriracha mixed with apricot jam works in a pinch, though the flavor will shift slightly toward sharper heat. Drumsticks and wings also take beautifully to this glaze, though you'll need to reduce cooking time—wings need only about 20 minutes total, drumsticks about 25 to 30 depending on size. For a twist, try adding a tablespoon of miso paste to the glaze for deeper umami complexity, or swap the soy sauce for coconut aminos if you prefer that earthy sweetness.
- Make the glaze a day ahead and keep it in the refrigerator—it actually allows flavors to meld and deepen.
- If your glaze seems too thick straight from the jar, thin it slightly with water or vinegar before mixing with other ingredients.
- Leftover glazed chicken makes extraordinary sandwiches the next day if there are any pieces left uneaten.
 Pin
Pin This recipe has earned its place in my regular rotation because it delivers restaurant-quality flavor without requiring restaurant-level stress or skill. It's the kind of dish that makes you feel like you know what you're doing in the kitchen, even on nights when you absolutely don't.
Recipe Q&A
- → What type of chicken is best for this dish?
Bone-in, skin-on chicken thighs are recommended for juiciness and flavor, but drumsticks or wings can be used with adjusted cooking times.
- → Can I make the glaze spicier?
Yes, adding a teaspoon of sriracha or hot sauce to the glaze increases the heat level without overpowering the sweetness.
- → How should I check if the chicken is fully cooked?
Use an instant-read thermometer to ensure the internal temperature reaches 75°C (165°F) for safe consumption.
- → What sides pair well with this chicken?
Steamed rice, roasted vegetables, or a crisp salad complement the sweet and spicy glaze nicely.
- → Is this dish suitable for gluten-free diets?
Yes, by using tamari instead of soy sauce and verifying the chili jam ingredients, it can be made gluten-free.