 Pin
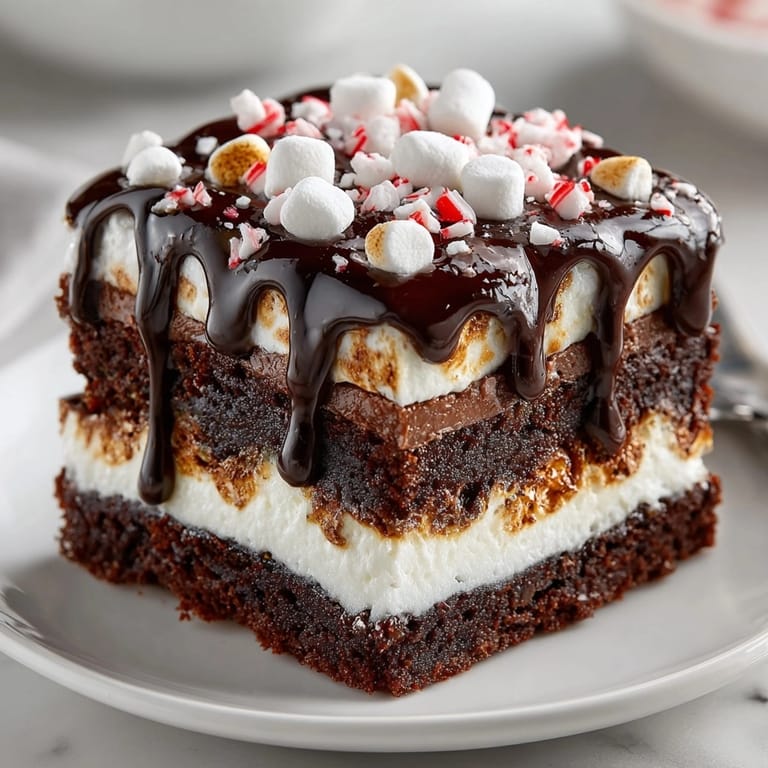
Pin This silly cake peppermint hot cocoa marshmallow bar recipe transforms ordinary chocolate cake into a playful winter treat that combines all the best elements of hot chocolate in a sliceable form. The triple-layer dessert features a moist chocolate cake base, creamy peppermint-infused hot cocoa middle, and a toasted marshmallow topping that makes everyone smile when they bite into it.
I created these bars for my daughter's winter birthday party last year, and they were such a hit that they've become our signature holiday dessert. The kids gather around the oven window to watch the marshmallows puff up like magic under the broiler.
Ingredients
- All purpose flour: provides the perfect structure for the cake base without becoming too dense
- Unsweetened cocoa powder: offers deep chocolate flavor in both layers use Dutch processed for richer color
- Heavy cream: creates a silky smooth hot cocoa layer that sets up perfectly
- Peppermint extract: adds holiday flavor without overwhelming the chocolate use pure not imitation for best results
- Mini marshmallows: toast more evenly than large ones and provide the perfect ratio of marshmallow to cake
- Crushed peppermint candies: add festive color and a delightful crunch to contrast the soft textures
Tired of Takeout? 🥡
Get 10 meals you can make faster than delivery arrives. Seriously.
One email. No spam. Unsubscribe anytime.
Instructions
- Prepare the Baking Pan:
- Line your 8x8 pan with parchment paper leaving generous overhang on two sides. This creates handles that will make removing the finished bars incredibly easy. Press the paper into corners firmly so your layers will have clean edges.
- Mix the Cake Batter:
- Whisk your dry ingredients thoroughly to eliminate any cocoa powder lumps before adding wet ingredients. When combining wet and dry components use gentle folding motions stopping just when the batter becomes smooth. Overmixing will develop gluten and create a tough cake.
- Bake the Chocolate Base:
- Spread batter evenly in your prepared pan using an offset spatula for perfect distribution. The cake is done when it springs back lightly when touched and a toothpick inserted in the center comes out with only a few moist crumbs.
- Create the Peppermint Hot Cocoa Layer:
- Heat cream just until steaming not boiling to prevent scorching. Remove from heat before adding chocolate chips and cocoa powder to prevent seizing. Stir continuously until completely smooth before adding peppermint extract and powdered sugar.
- Set and Top:
- Allow the hot cocoa layer to cool slightly before pouring over cake to prevent excessive soaking. Refrigerate until the layer is tacky but not completely firm about 15 minutes. This helps the marshmallows adhere without sinking.
- Toast the Marshmallows:
- Position oven rack 6 inches from broiler element. Watch constantly during broiling as marshmallows can go from perfectly golden to burnt in seconds. Rotate the pan if needed for even browning.
- Finish and Cool:
- Sprinkle crushed peppermint candies immediately while marshmallows are still warm so they adhere properly. Allow bars to cool completely at room temperature about 30 minutes before cutting for cleanest results.
 Pin
Pin The peppermint extract is truly the secret ingredient in this recipe. I discovered that adding it to both the hot cocoa layer and sprinkling crushed candies on top creates the perfect amount of mint flavor without overwhelming the chocolate. My grandmother always said peppermint and chocolate were made for each other, and these bars prove her right every time.
Storage Tips
These bars are best enjoyed within 24 hours of making them, as the marshmallow topping will gradually soften and lose its toasted texture. Store leftover bars in an airtight container at room temperature with parchment paper between layers to prevent sticking. Avoid refrigeration as this will make the cake layer firm and the marshmallows tacky.
Smart Substitutions
If you need to make these dairy-free, substitute coconut milk for whole milk in the cake and coconut cream for heavy cream in the middle layer. The flavor will have a slight tropical note that actually complements the chocolate beautifully.
For a gluten-free version, replace the all-purpose flour with a 1-to-1 gluten-free baking blend. Add 1/4 teaspoon xanthan gum if your blend doesn't already contain it to maintain the proper texture.
Not a peppermint fan? Try almond extract instead for a completely different but equally delicious flavor profile reminiscent of Italian hot chocolate.
Seasonal Variations
For summer gatherings transform these into smores bars by omitting the peppermint and adding a graham cracker crust beneath the cake layer
During fall replace peppermint with cinnamon and add a sprinkle of nutmeg to the hot cocoa layer
For spring celebrations add 1 tablespoon of freeze dried strawberry powder to the hot cocoa layer for a chocolate covered strawberry vibe
 Pin
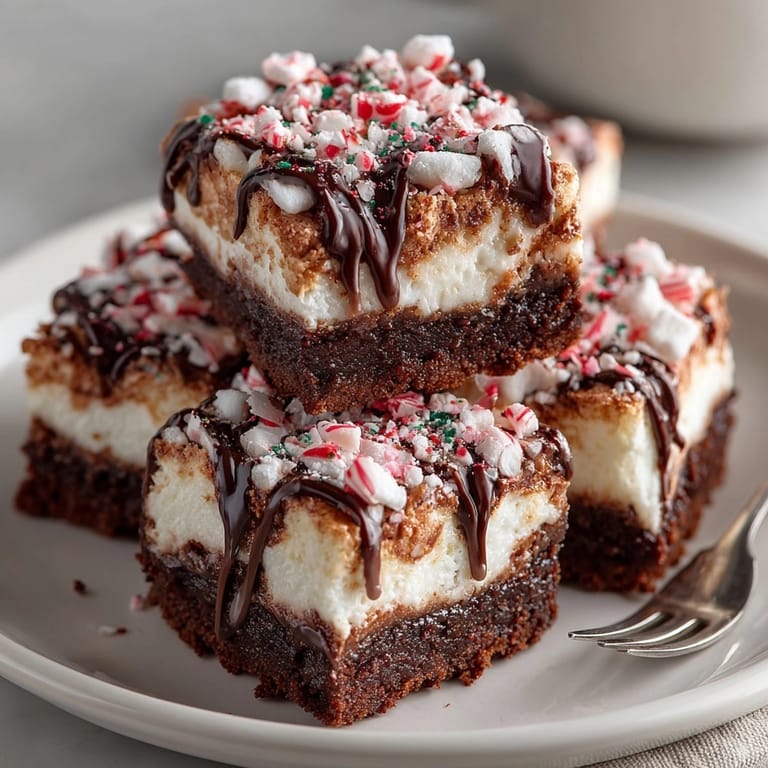
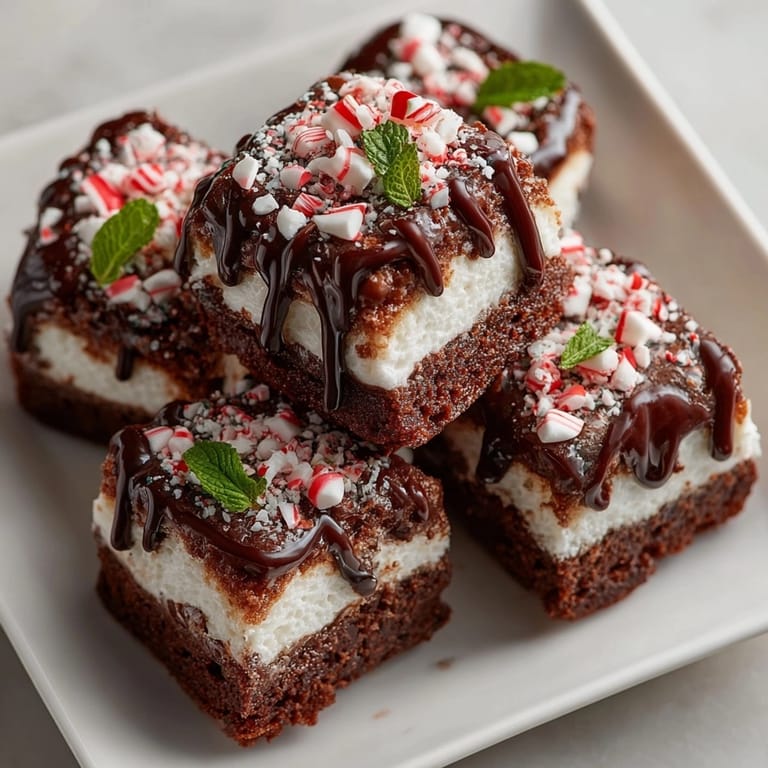
Pin For the cleanest cuts, use a sharp knife dipped in hot water and wiped clean between slices. This prevents the marshmallow layer from dragging and creates picture-perfect servings every time. I learned this trick from a pastry chef friend who swears it's the difference between homemade looking treats and professional presentation.
Recipe Q&A
- → Can I use a different extract instead of peppermint?
Yes, you can substitute peppermint extract with orange or almond extract for a unique flavor twist.
- → What’s the best way to toast the marshmallows?
Broil on high for 1–2 minutes, keeping a close watch as marshmallows brown quickly under the broiler.
- → How do I achieve clean bar slices?
Allow the bars to cool completely in the pan before removing and slicing with a sharp, greased knife.
- → Can these bars be made ahead of time?
They’re best eaten the day they’re made, but can be stored in an airtight container for up to two days.
- → How can I make the bars nut-free?
Omit any nut additions and ensure your peppermint candies and other ingredients are nut-free as labeled.